Getting Started with SweepTag
Get SweepTag up and running in 5 minutes. This guide covers installation, first-time setup, and your first barcode.
Installation
Requirements
- iOS 15.1+ or Android 7+
- App: Available on App Store and Google Play
- Optional: Lansweeper account (for IT infrastructure barcoding)
Install Steps
-
Open your device's app store
- iOS: App Store
- Android: Google Play
-
Search for "SweepTag" and tap Install
-
Wait for download to complete (~80 MB)
-
Launch the app and follow the setup wizard
First Launch: Setup Wizard
When you open SweepTag for the first time, you'll see the Welcome Screen asking "How do you want to get started?" with three options (plus a Decide later link that skips setup — you can still generate standalone barcodes from the Codes tab and set things up whenever you're ready).
Option 1: Use SweepTag standard (Fastest)
Best for: Getting going immediately, with no setup
What you get: A ready-made collection called sweeptag-assets with the most common fields already in place — Name, Serial number, Location, Status, and Notes
Setup takes: a few seconds
Steps:
- Tap "Use SweepTag standard"
- Done! The app opens with your collection ready — start adding assets from the Home or Assets tab right away
You can rename the collection, add or remove fields, and even add asset types any time later (see Asset Types).
Option 2: Use SweepTag advanced (Build your own)
Best for: Managing your own assets with a data model you design
What you get:
- A collection built from a starter kit you choose (or from scratch)
- Custom fields (9 data types to choose from)
- Asset types, so one collection can track several kinds of items
- Barcode generation for each asset
Setup takes: ~2 minutes
Steps:
- Tap "Use SweepTag advanced"
- Name your collection (e.g., "My Tools" or "Lab Equipment")
- Choose a starter kit (IT equipment, Tools & machines, AV gear, Furniture & office, Facilities, or Blank) — each kit includes ready-made asset types (see Asset Types) — or tap Skip to start with a default collection
- Fine-tune the fields and asset types to match how you work
- Done! Your collection is ready to add assets
Option 3: Connect to Lansweeper (For IT professionals)
Best for: Barcoding your entire IT infrastructure
What you get:
- Access to all your Lansweeper assets
- Automatic asset sync
- Multi-site support
- Custom field creation
- Barcode write-back to Lansweeper
Setup takes: ~3 minutes
Steps:
- Tap "Connect to Lansweeper"
- Follow the in-app instructions to create a Personal Access Token (PAT) in Lansweeper (app.lansweeper.com › your initials › Account settings › Developer Tools › Add New API Client) — no API URL needed
- Name the connection and paste the PAT into SweepTag
- SweepTag auto-discovers all authorized sites
- Done! You're connected
Just exploring? Try the demo data
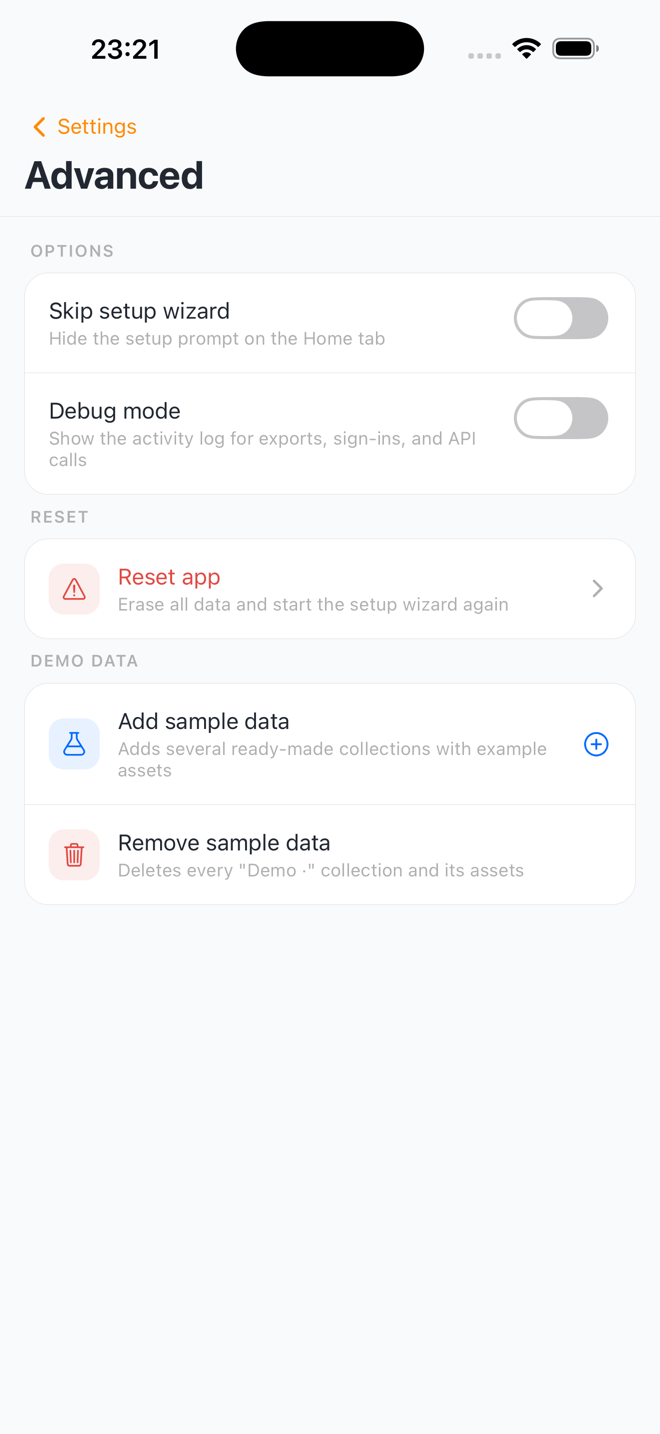
Whichever option you pick (including Decide later), you can fill the app with example data to see how everything works: go to Settings › Advanced, find the Demo data card, and tap Add sample data. SweepTag adds five demo collections (about 90 assets) you can browse, barcode, and print. When you're done, tap Remove sample data on the same screen — your own collections are untouched.
Generate Your First Barcode
Scenario A: No Collection (chose "Decide later")
- Open the Codes tab (bottom navigation)
- Tap "Create" in the header, then choose Standalone code
- Pick what kind of code you want: Wi-Fi, Link, or Text
- Fill in that kind's fields (a network name and password, a URL, or your text) — a live preview of the QR code appears right in the sheet
- Tap "Save code"
- Your code is saved under My codes in the Codes tab
- Print or Share: Open the code and tap the print icon or share button
Standalone codes are always QR codes. Need a Code 128 barcode? Create a collection and generate barcodes for its assets instead (Scenario B).
Scenario B: Local Collection Owner
- Open the Assets tab (bottom navigation)
- Select your collection from the list
- Tap "+" to add an asset
- Fill in the details:
- Asset type: Pick what kind of item this is (skipped if your collection has only one type)
- Name: Asset name (required)
- Other fields: Depends on your starter kit and the chosen type
- Tap "Save"
- Asset created! Now you can generate a barcode for it
- To generate a barcode:
- Open the asset and tap Generate barcode — the code is created instantly using the collection's barcode setup (tap Barcode setup on the same screen to change the format or link)
- Or barcode many assets at once: in the asset list, tap Select, tick the assets, then tap Barcodes
Scenario C: Lansweeper User
- Open the Assets tab (bottom navigation)
- Select "Lansweeper" and your site
- Browse or search for an asset
- Open the asset detail
- Tap "Generate" — the barcode is created instantly using your Lansweeper barcode settings
- Barcode appears! Print, share, or preview (the button becomes Regenerate)
To change the format (QR or Code 128) or what the barcode links to, go to Settings › Integrations › Lansweeper — the options there apply to every Lansweeper barcode you generate.
Quick Barcode Overview
What's a QR Code?
- Encodes: URLs, text, asset keys, or custom data
- Scannable: With any smartphone camera or barcode scanner
- Best for: Asset tracking, quick links, full data storage
- Size: Varies based on data (small to medium)
What's a Code 128?
- Encodes: Numbers and basic text (smaller than QR)
- Scannable: With dedicated barcode scanners
- Best for: Dense labeling on small items
- Size: Narrow horizontal bar pattern
Which Should I Use?
| Use Case | Recommendation |
|---|---|
| I want to scan with a smartphone | QR Code |
| I want to scan with a barcode gun | Code 128 |
| I want the most data in a small space | QR Code |
| I want a very dense barcode | Code 128 |
| I want it to link to something | QR Code |
What Can You Encode in a Barcode?
SweepTag supports several link types:
App link (Default)
- Encodes: A SweepTag link that opens this asset in the app when scanned
- Useful for: Jumping straight to the asset's details with one scan
Lansweeper web
- Encodes: Direct link to the asset in Lansweeper
- Useful for: Linking to full asset details in your IT system
- Only for: Lansweeper connections (set it under Settings › Integrations › Lansweeper)
Custom URL
- Encodes: Any URL you specify (e.g.,
https://yoursite.com/assets/{assetKey}) - Useful for: Linking to custom systems or external tools
- Customizable: Use the
{assetKey}placeholder — it's replaced by the asset's key. Without a placeholder,?assetKey=…is appended automatically. For local collections, you pick which field acts as the asset key in the collection's Barcode setup.
Want more than a link in a QR code? A local collection's Barcode setup can also embed extra fields directly in the QR code, and Wi-Fi asset types and standalone codes produce join/link/text QR codes of their own.
Print Your First Label
- Generate a barcode (see above)
- In the barcode preview, tap the print icon 🖨️
- Choose print size:
- Small: 48 × 30 mm (2" × 1.2")
- Medium: 70 × 45 mm (2.8" × 1.8")
- Large: 100 × 60 mm (3.9" × 2.4")
- Choose content: Barcode only, or include name/value/date
- Tap "Print" → Select printer
- Done! Your label prints
Print Requirements
- Needs: AirPrint printer (iOS) or network printer (Android)
- Paper: Any size, but 4" × 6" thermal labels are ideal
- Wireless: Printer must be on same network as your device
Navigation Overview
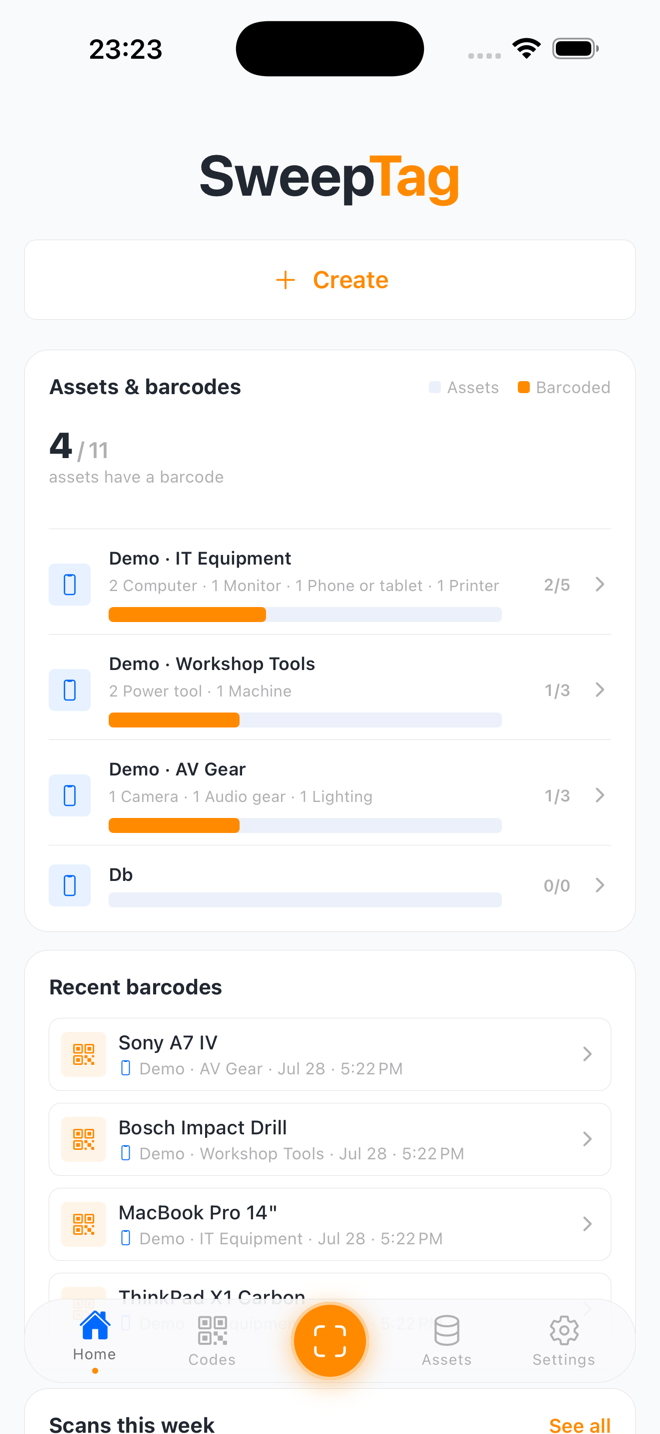
Bottom Tabs
| Tab | Purpose |
|---|---|
| Home | Overview of all collections, barcoded assets, scan history |
| Codes | View all generated barcodes, print, share |
| Scan | Scan barcodes and log interactions |
| Assets | Browse and manage your collections and assets |
| Settings | Configure app, integrations, preferences |
Key Screens Explained
Home Tab:
- Scans this week at the top — your scanning activity over the last 7 days
- Statistics on all your collections (assets and barcode progress)
- Quick access to add new collections
Codes Tab:
- Two views: List (by collection) or Files (by folder structure)
- Search all barcodes
- Preview, print, or share any barcode
Assets Tab:
- Browse all collections
- Search assets
- Filter and sort a collection's asset list (tap the sliders icon next to the search box to open Filter & sort)
- Add, edit, or delete assets
- Generate barcodes per asset
Scan Tab:
- Tap to open camera
- Point at any barcode
- Automatically classifies scan type
- Logs interaction in history
Settings Tab:
- Integrations (manage Lansweeper connections and file-export destinations — folder, SMB share, iCloud, OneDrive, Google Drive)
- Barcode configuration (default format, links, and file structure)
- Printing (label size and what's printed on each label)
- Data (per-collection export, plus Import CSV / JSON into a collection or Import a collection to create a new one from a file)
- Appearance (theme, swipe actions)
- Formats (date format, default currency)
- Advanced (reset, demo data, and a Debug mode that shows the on-device activity log for exports, sign-ins, and API calls)
Common Next Steps
I want to...
Add more assets to my collection → Adding Assets Guide
Bring in existing data from a spreadsheet → Import a CSV or JSON file from Settings › Data (see Adding Assets)
Track different kinds of assets in one collection → Asset Types
Print multiple barcodes at once → Batch Printing Guide
Connect more collections or Lansweeper sites → Multi-Collection Setup
Customize how barcodes are named → File Structure & Naming
Understand all barcode options → Barcode Configuration
Scan barcodes and track assets → Scanning Guide
Need Help?
- Stuck on setup? Check FAQ
- Error connecting to Lansweeper? See Lansweeper Troubleshooting
- Printer not found? See Printing FAQ
- Want to explore all features? Read Feature Guides
You're all set! Proceed to explore SweepTag in your preferred area:
- I just want to generate barcodes → Start scanning or printing
- I have a collection to manage → Adding assets
- I'm connecting Lansweeper → Lansweeper integration guide